Run PHPUnit Tests with Docker in IntelliJ/PHPStorm
Nowadays IDEs like IntelliJ, PHPStorm, or Visual Studio Code make it a joy to write software with an ultrafast feedback loop by allowing us to run our tests while developing in the same window (you do write tests…right? Right?). However, the initial setup can be tricky - especially when our project uses the oh-so-common setup of running everything in Docker containers.
The official IntelliJ IDEA documentation lists the steps involved in the setup process, yet does not showcase a fully-working version of the configuration. In this article, I aim to do just that.
This article is focused on IntelliJ/PHPStorm, but a similar outcome can be achieved in VS Code with the excellent PHPUnit Extension.
Configure & Run PHPUnit with Docker
Context
Let’s assume we are working on a project already set up with a docker-compose.yml file - it may have the main app container running the PHP application, and other dependencies like a database or caching service.
Note: the screenshots which follow are from IntelliJ Ultimate.
PHP Interpreter
The first element to configure is the PHP Interpreter - we want to tell our IDE to use the one in our app container. When first opening Preferences -> Languages & Frameworks -> PHP we might see a screen like the below:
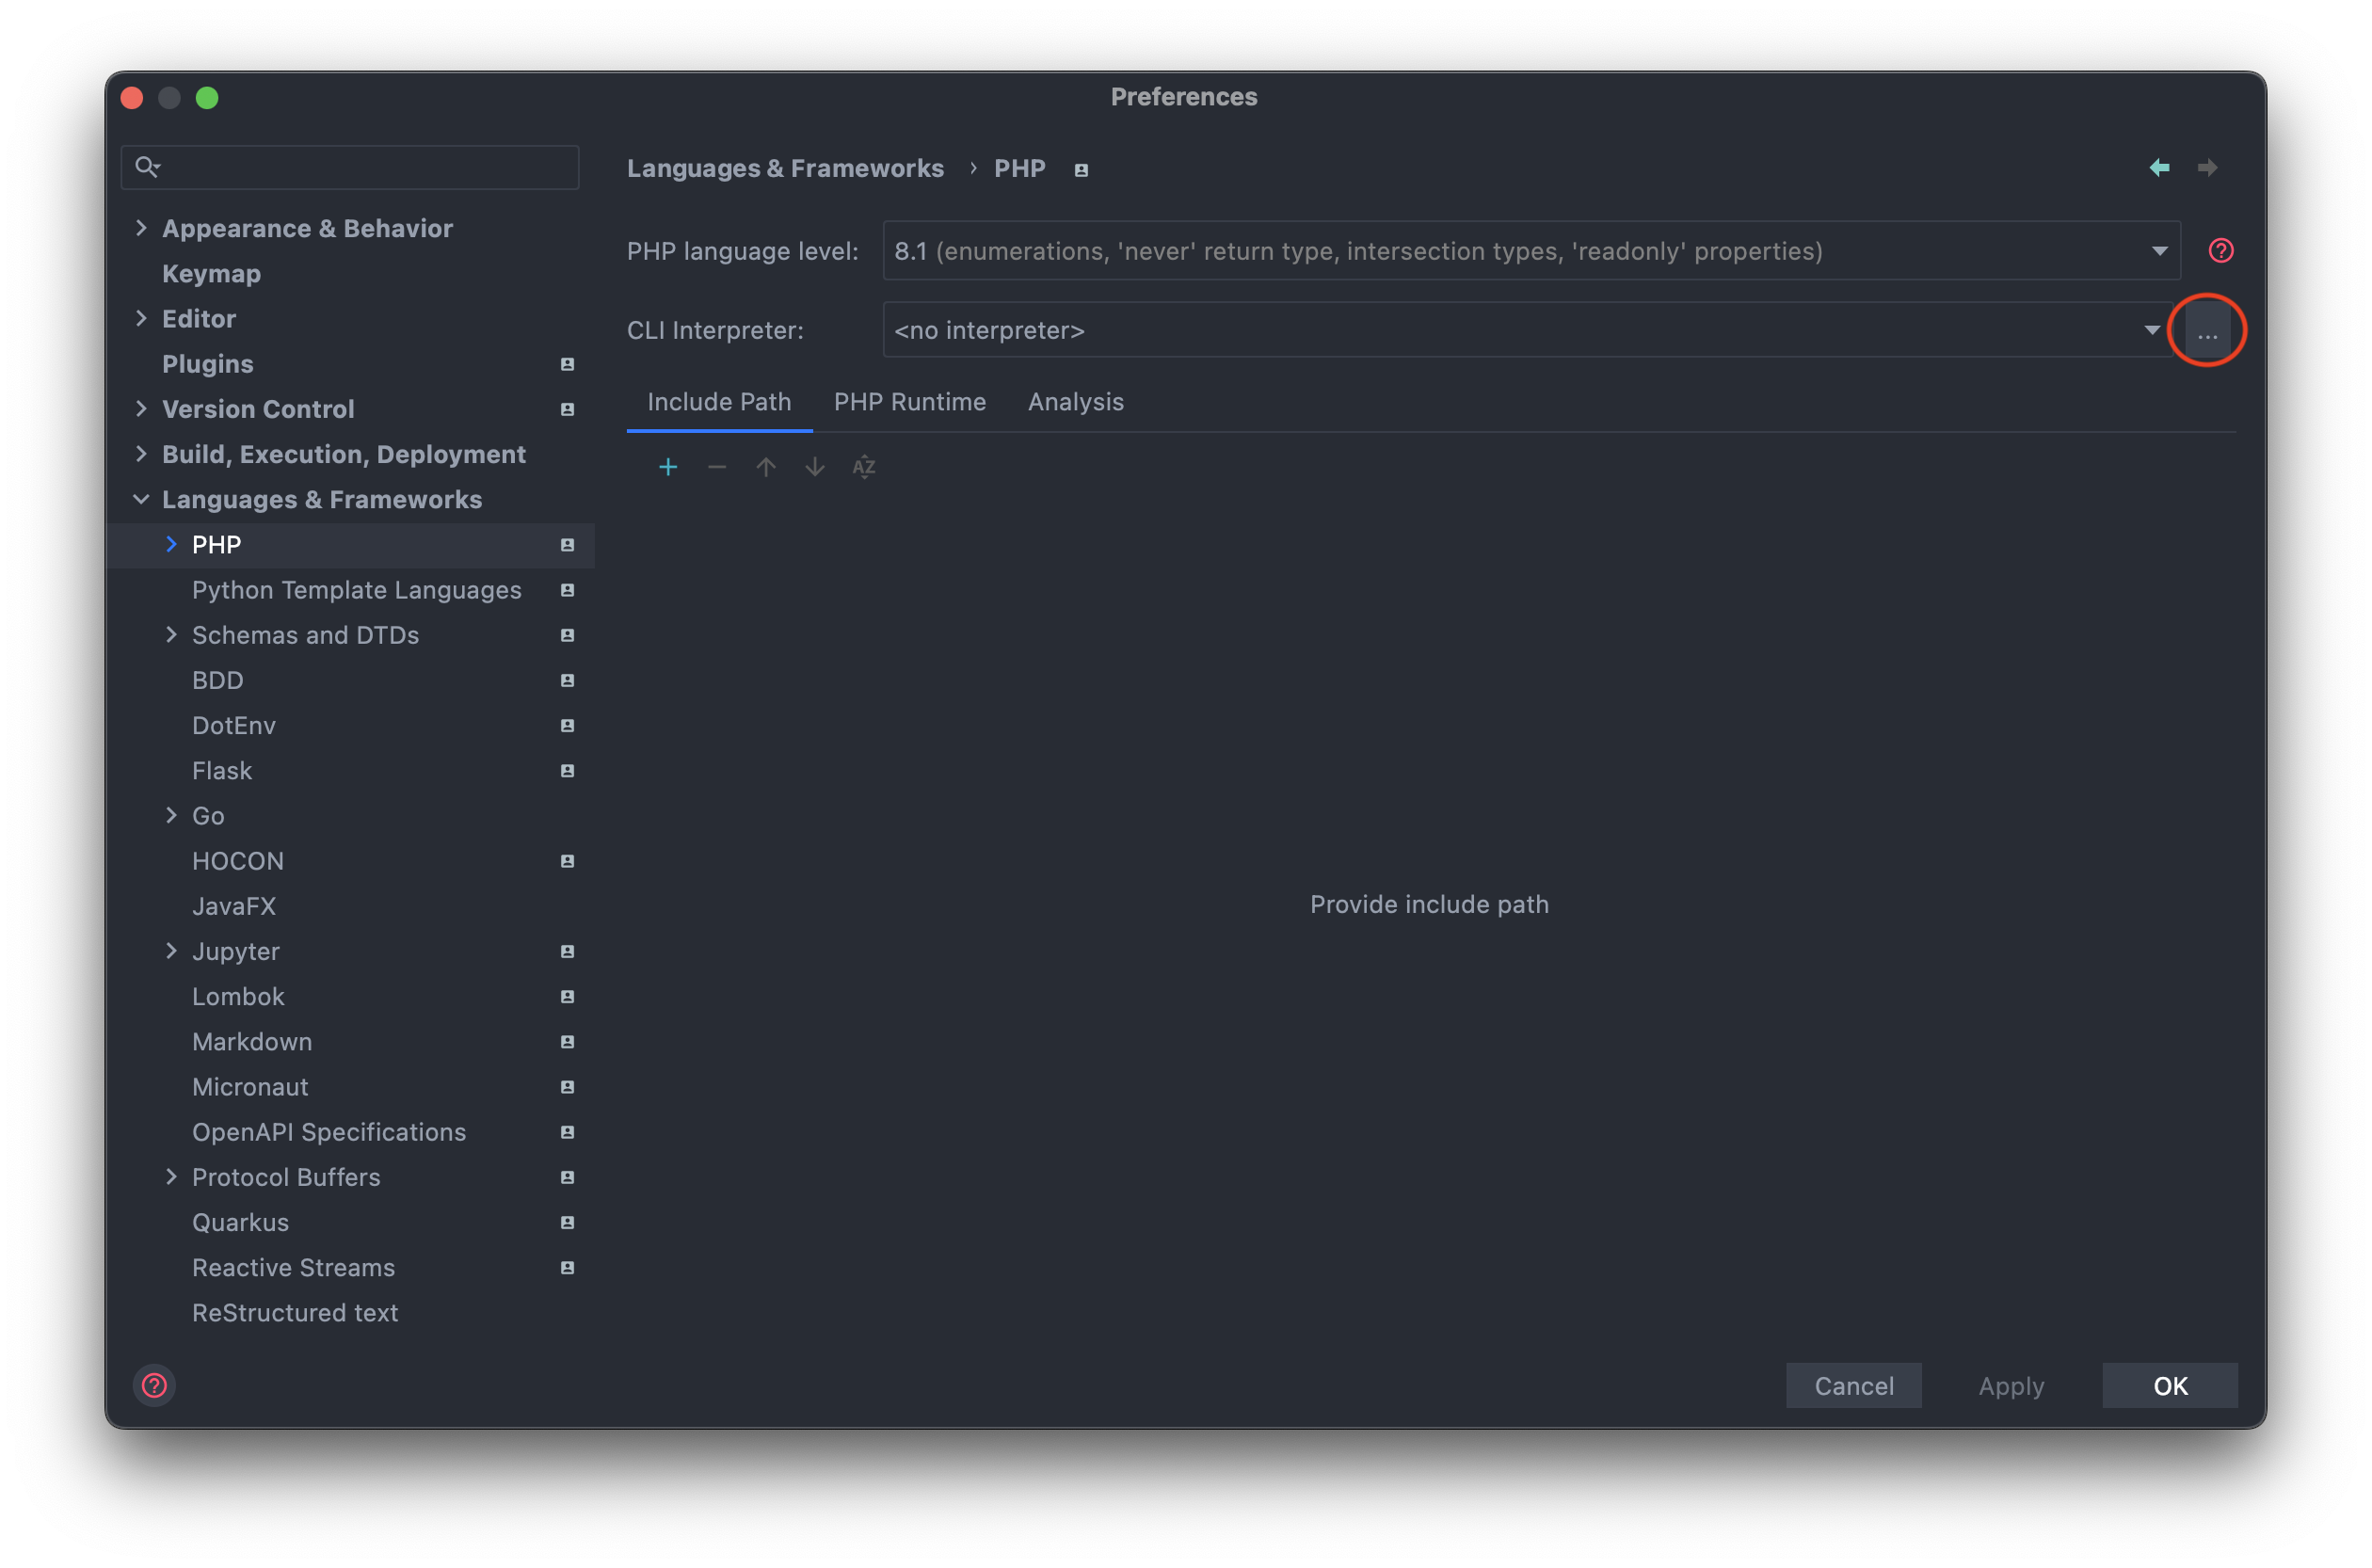
From here, we can create a new interpreter via the highlighted ... button. After adding a new Docker configuration, our setup should look like this:
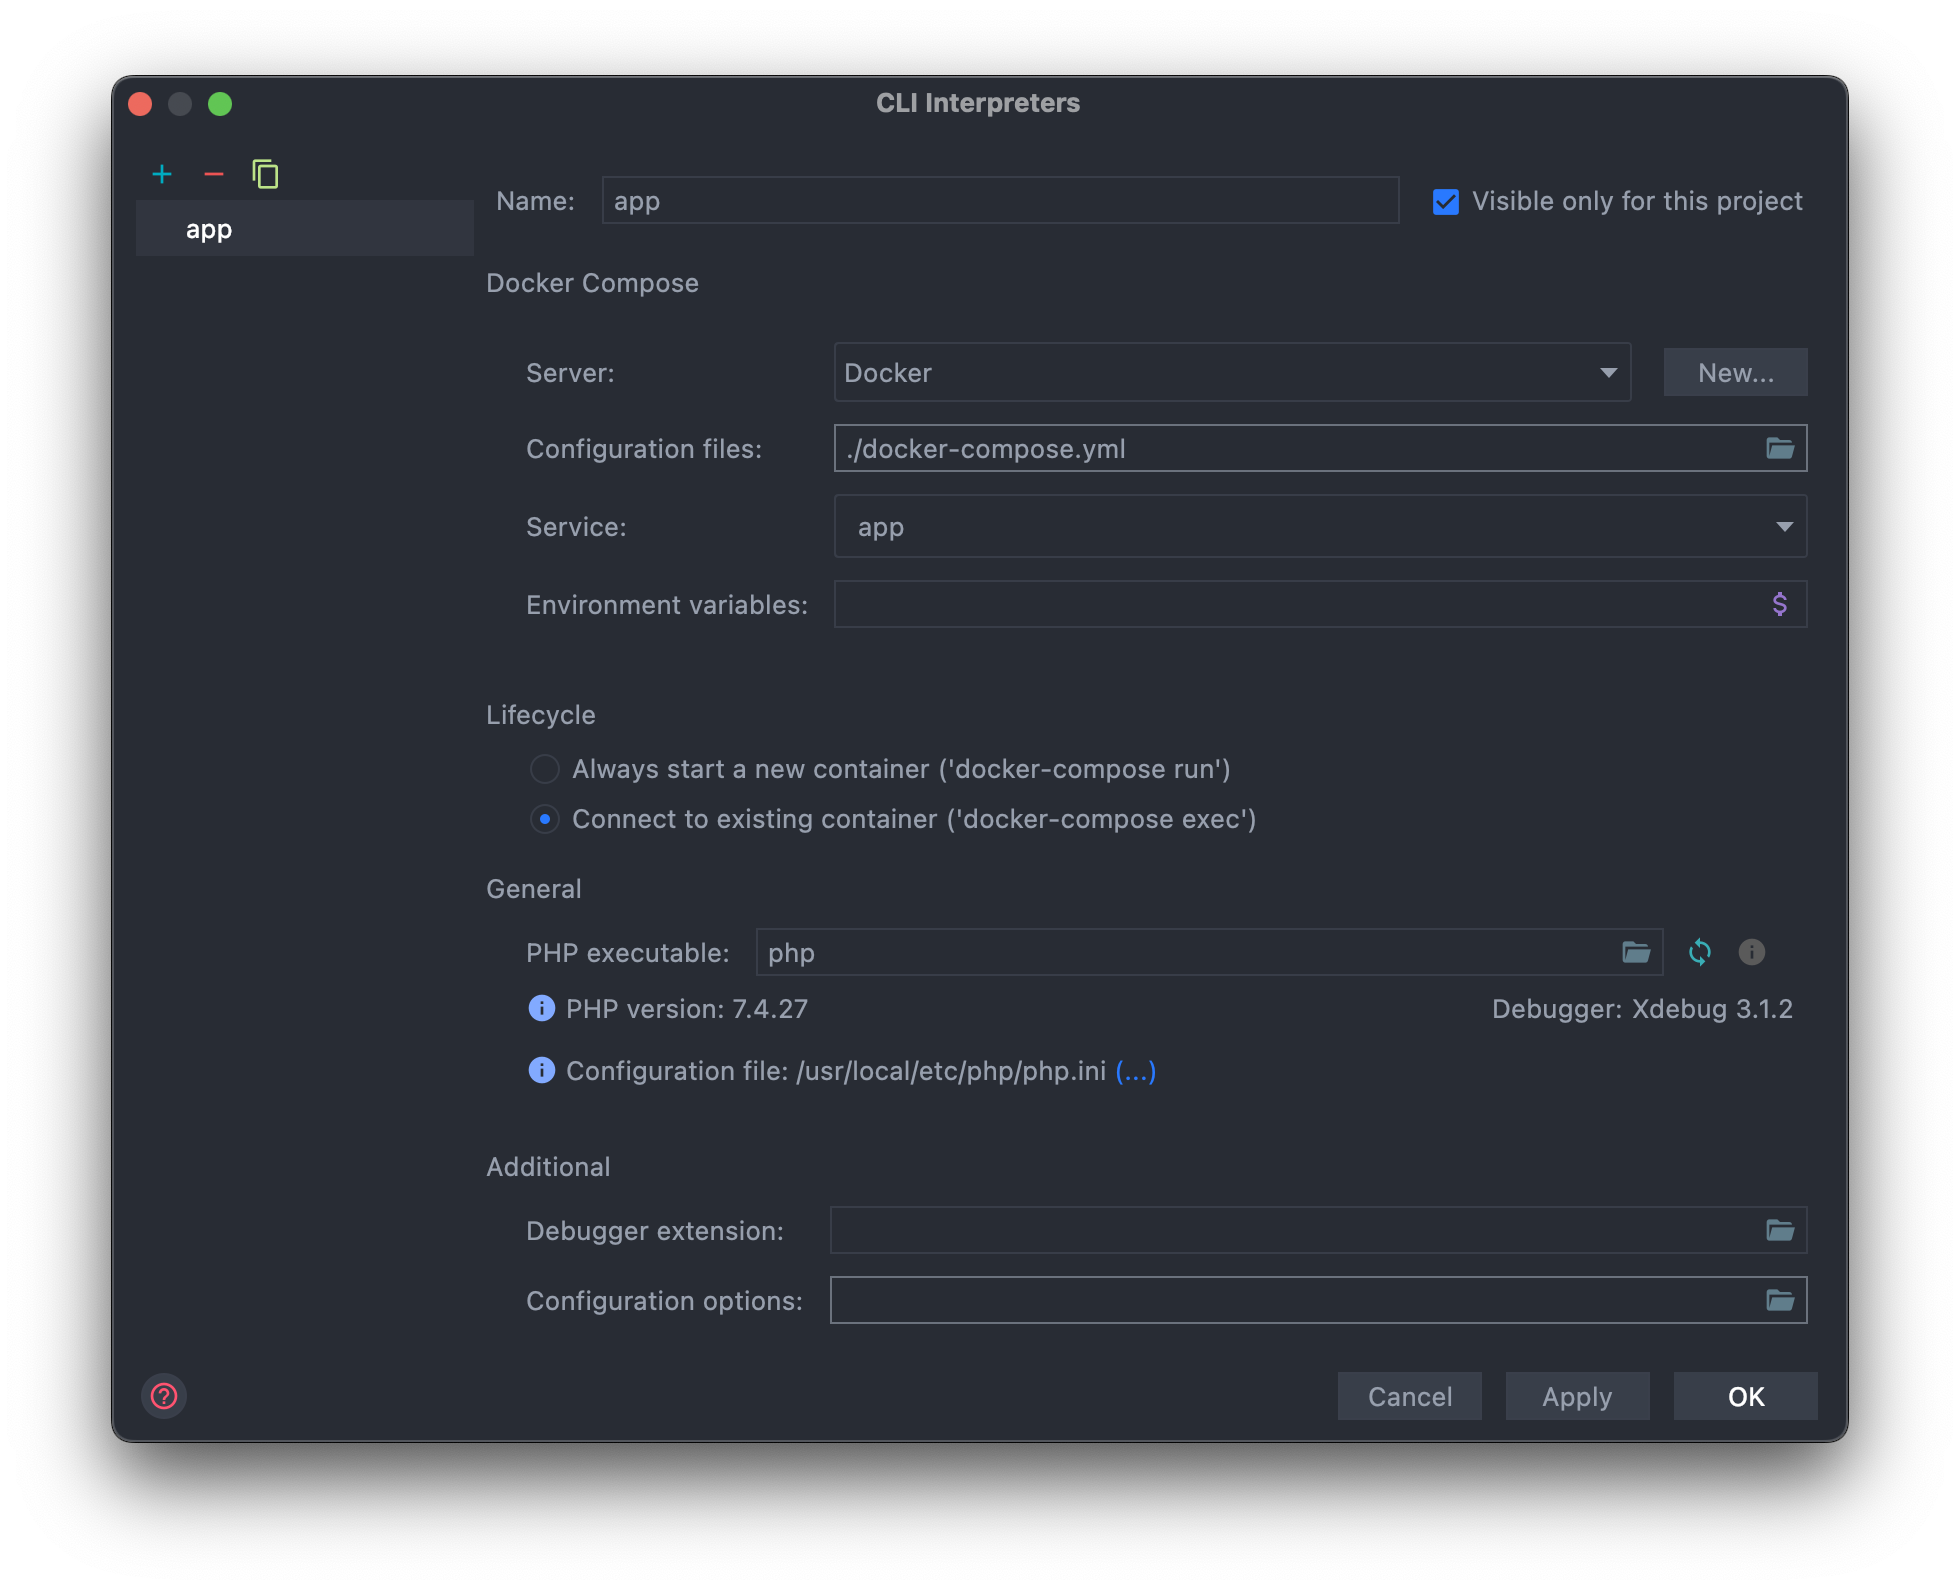
A few notable aspects:
-
we are allowed to select multiple compose files if needed
-
the interpreter can be used either by starting a new container each time, or by connecting to an existing container - the latter is generally preferable
-
the PHP executable with its version and config should automatically be detected
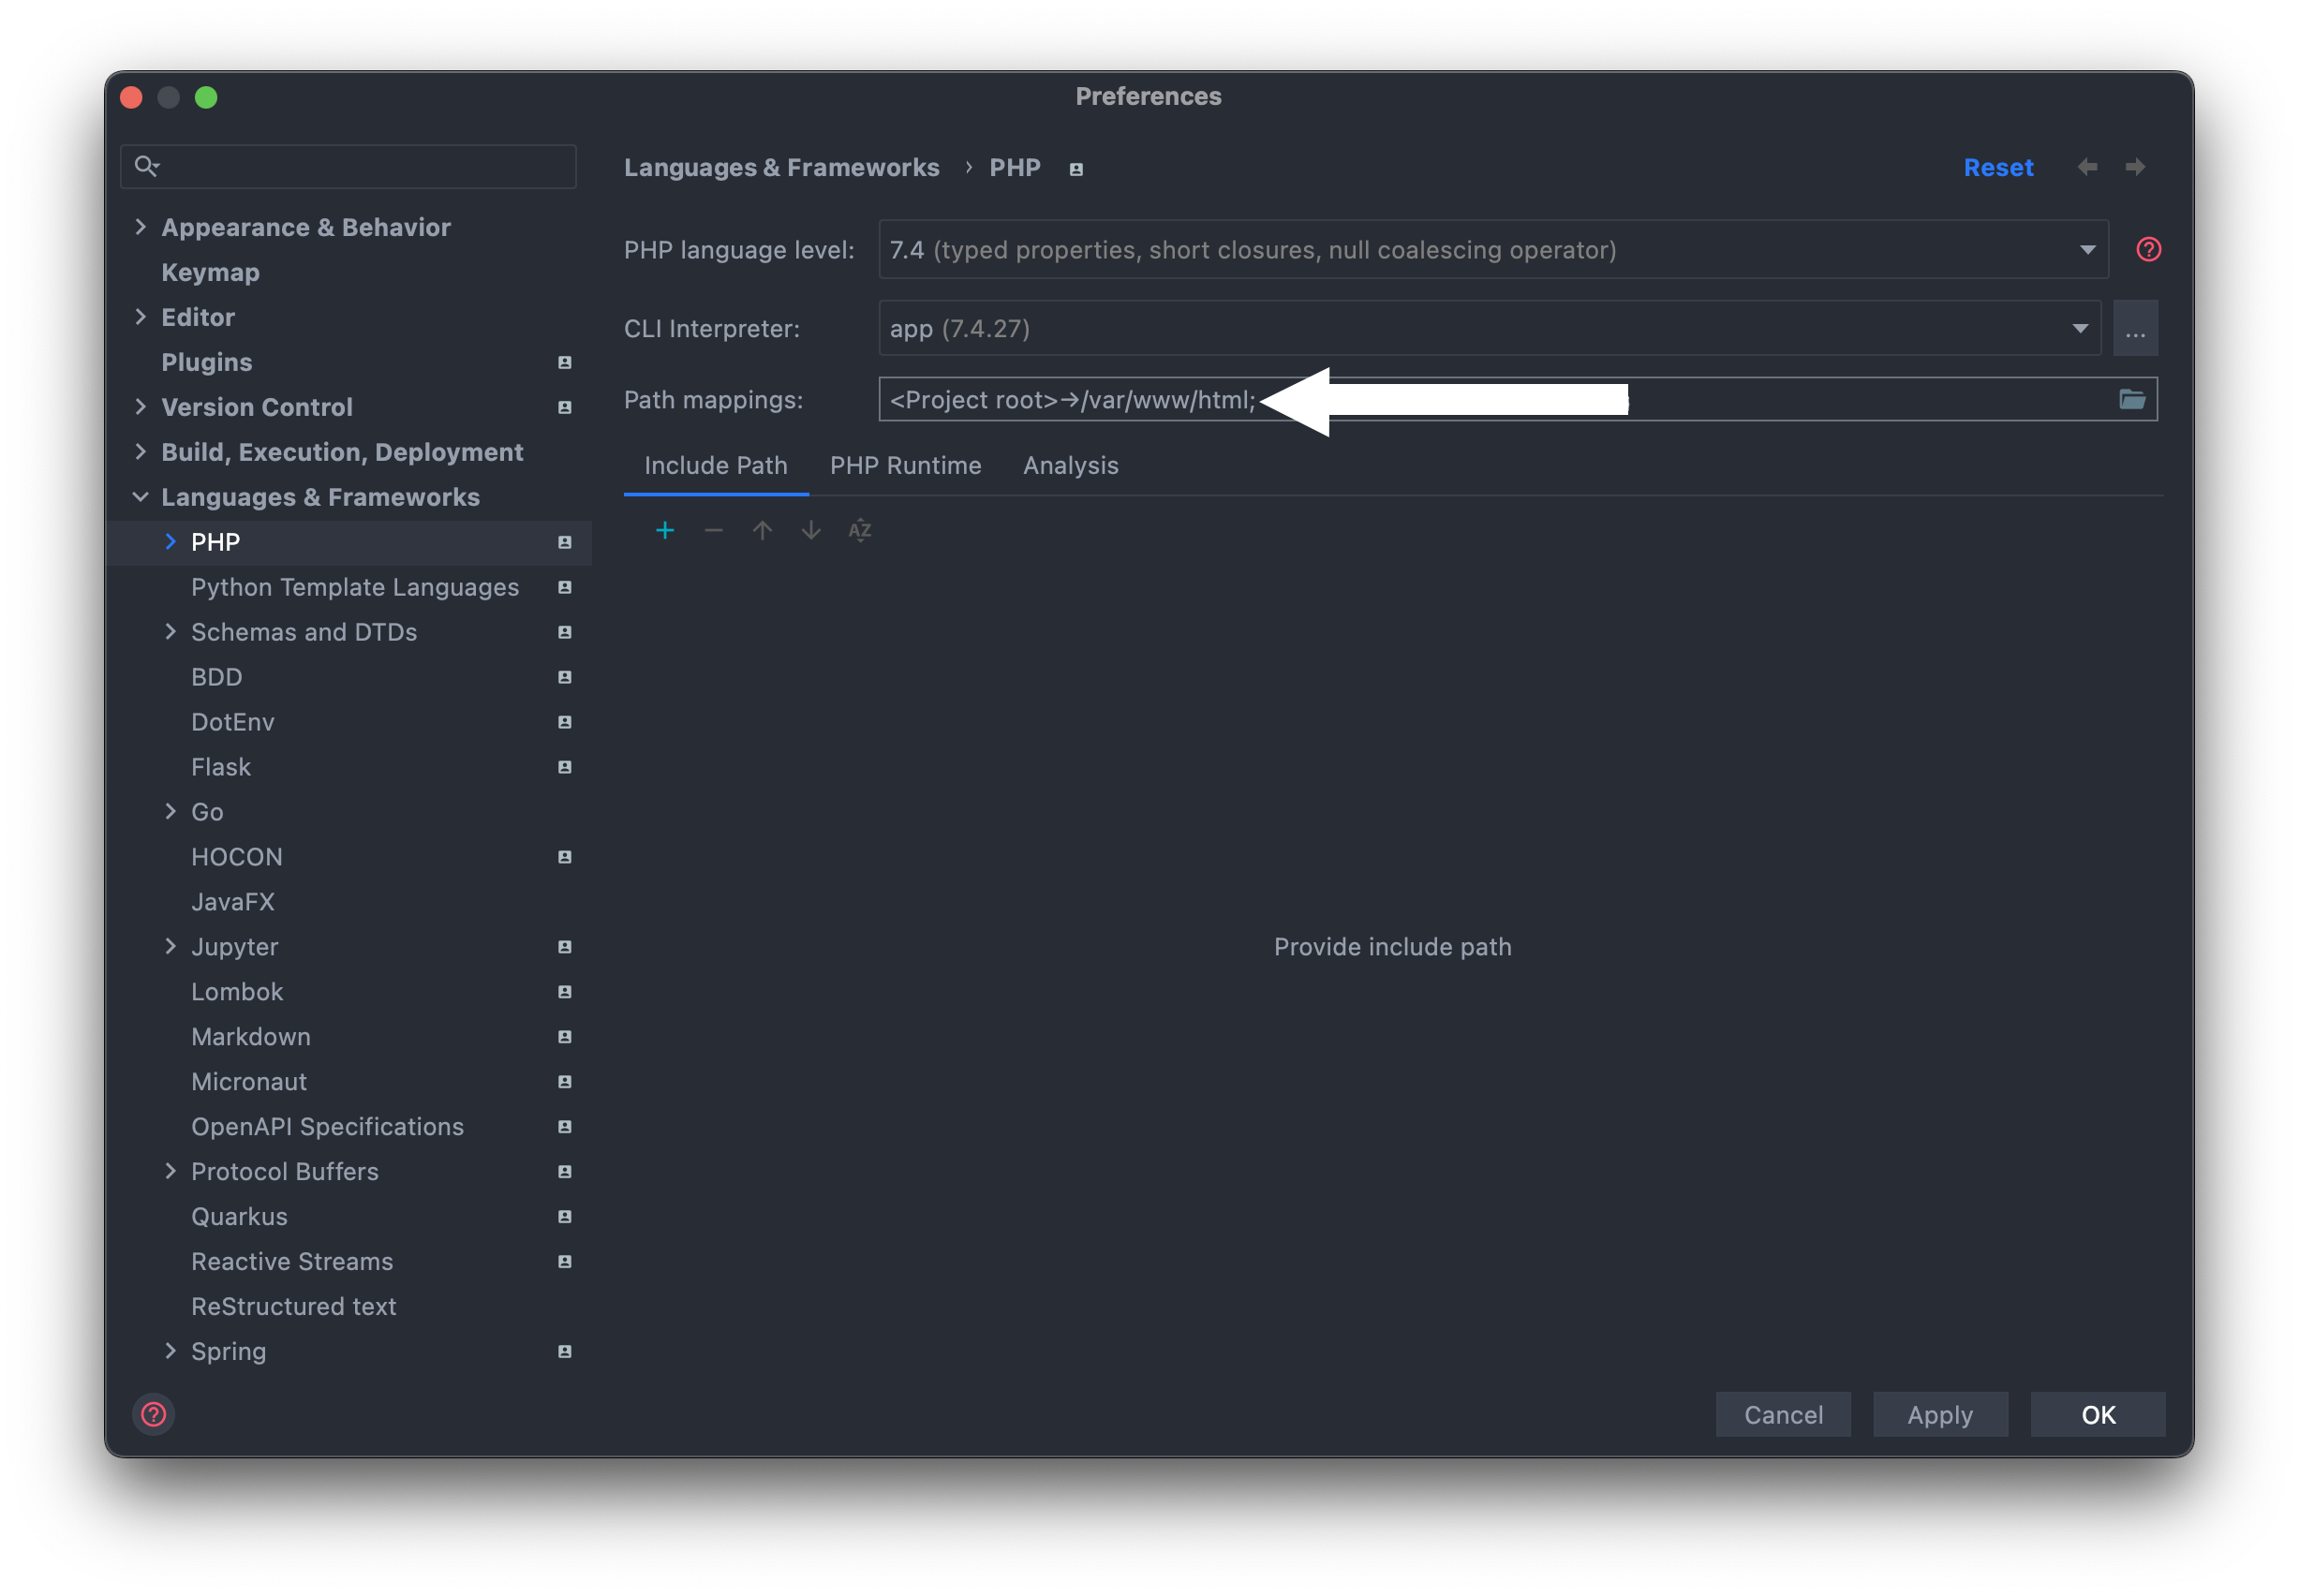
Once we’ve saved the new interpreter, the last remaining aspect is defining which path the project’s host directory maps to in the container. If the working directory is already specified in our compose file, this should be automatically detected. Otherwise, we can specify this manually in the Path mappings box.
PHPUnit
To add the PHPUnit configuration, head to Preferences -> Languages & Frameworks -> PHP -> Test Frameworks -> PHPUnit by Remote Interpreter. With the newly-added app interpreter, your window should look like the below:
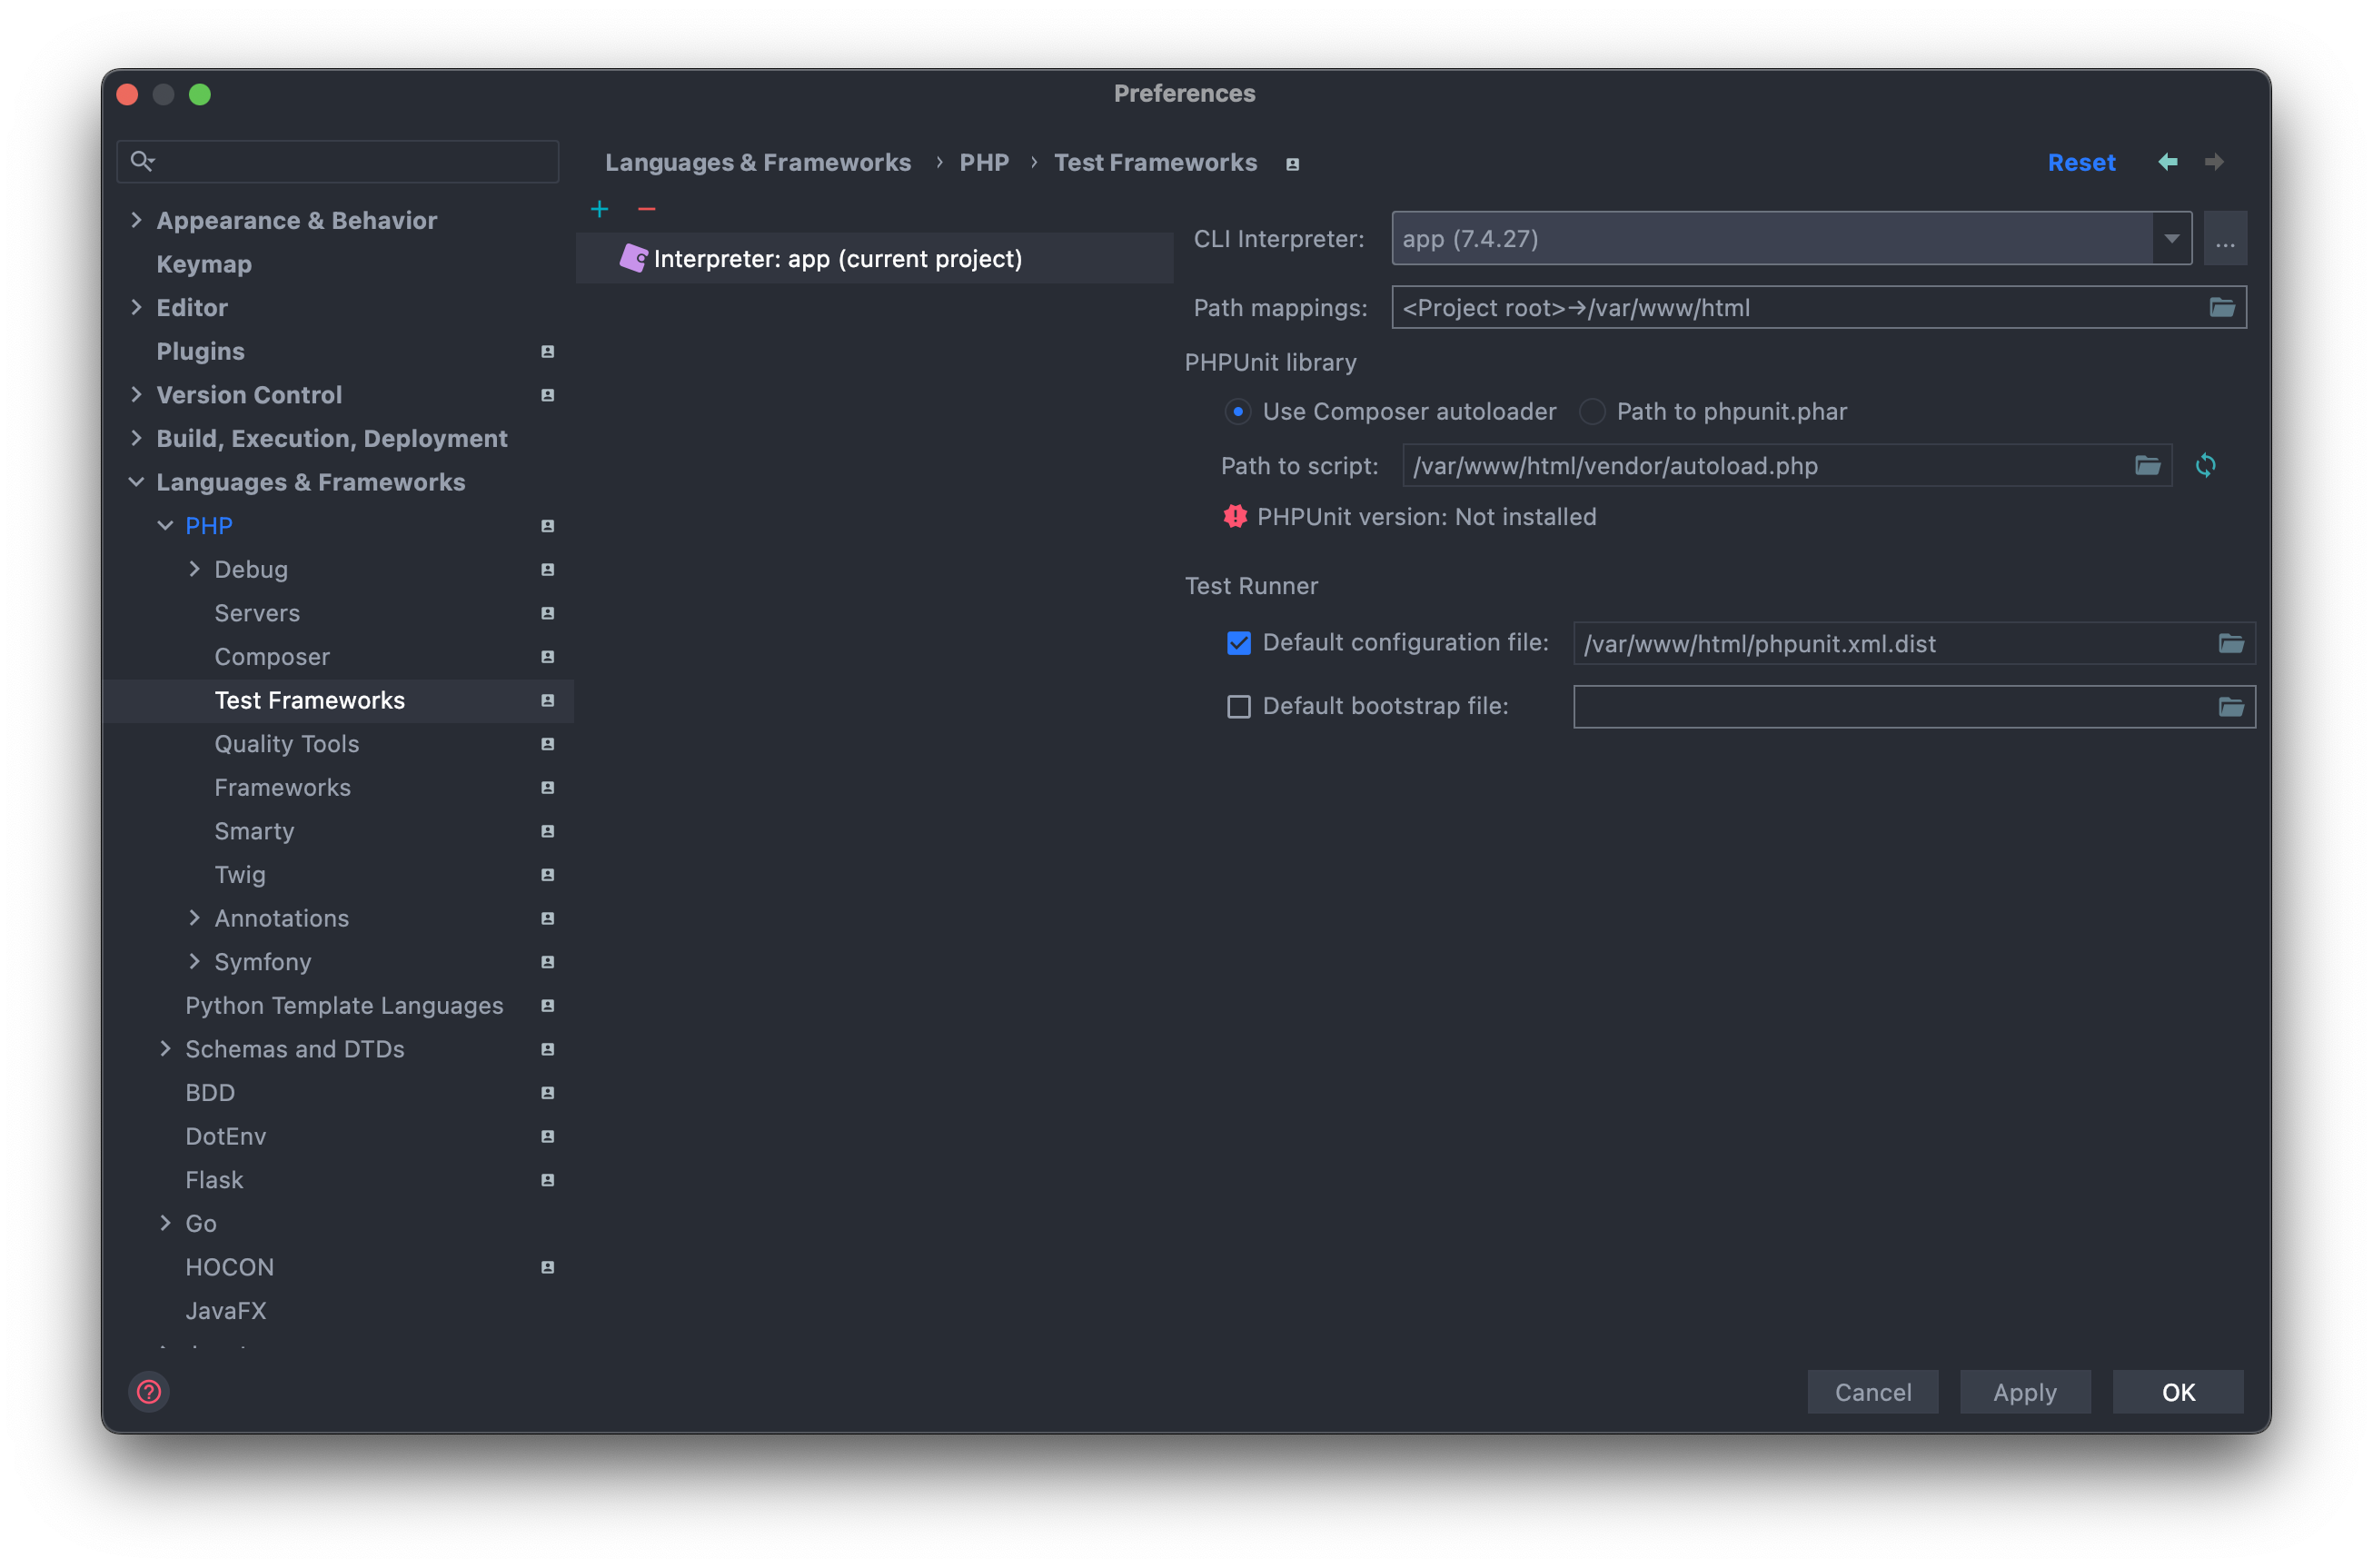
Using the Composer Autoloader should typically work out of the box and the PHPUnit version will be detected; in some cases, it might be necessary to provide the full path to the PHPUnit executable.
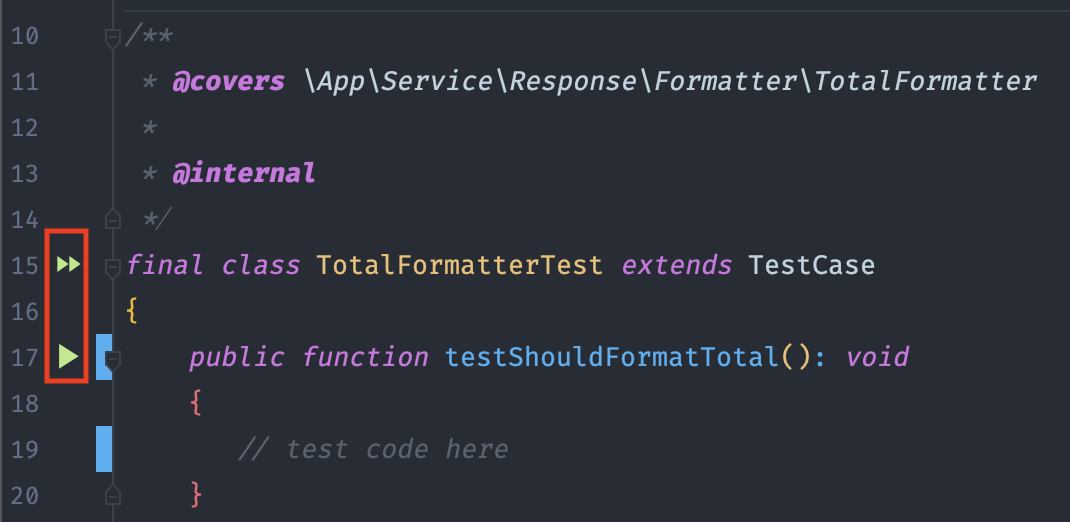
Running Tests
That’s it! Now we can run our tests right from our IDE! We can run a single test class or method via the green arrows highlighted below, or set up custom configurations based on namespaces or test groups.